If we will talk about expensive smartphones (e.g. Sony Xperia Z series), they usually have good internal memory and there is no need to use an external storage device. While on the other hand, low price smartphones are very poor in terms of internal memory. Their storage is always running out of low space. Android's system alone takes up to 4GB and the rest of the space was occupied by third-party apps, which you've installed manually and the media files (such as videos, images, music etc.,)

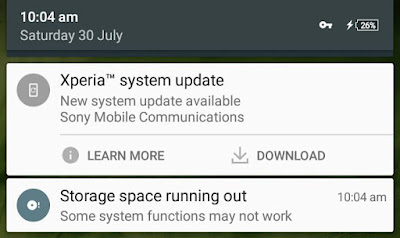
You might not know that the low memory space is very bad for your Android system health. It can affect your phone's performance due to which, some functions may not work properly. Apps may start hanging as they may not be getting the right space to work. When your internal memory is below threshold limit (say less than 200MB), you'll get an alert notifications as shown in below picture.

In my previous article, I had already discussed some of the tips which can help you to free up to 1GB of space in your Android phone. One the best way is to move the data from your Internal memory to SD card. Here are 3 different ways do this, literally a beginner's guide.
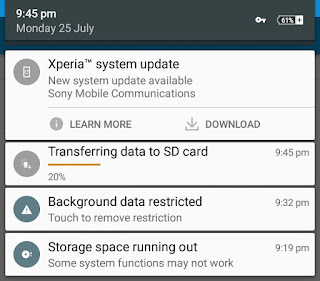
In latest version (5.0 or later), Android has added a new option which let you transfer all media files to the SD card at once. Sounds good? Here's a step-by-step guide to transfer them -

Note that, this feature may not transfer all media files. As much as I know, it will transfer your screenshots and camera photos (or videos) only. While rest of the data (such as media files you've downloaded via apps) will remain there in the internal memory. You've to move them manually.
Tip: It's recommended to change the storage location of camera to SD card, so that new photos will be saved there automatically.
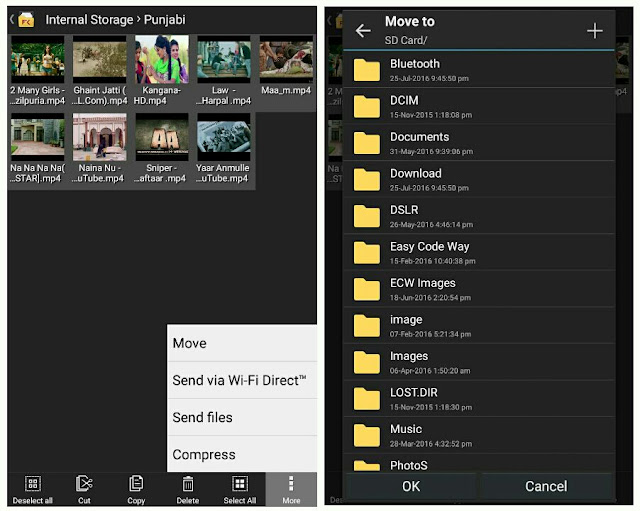
Almost all Android phones have in-built File Manager app using which you can manage data in your internal memory and SD card. If you don't have any, you can install number of third-party file manager apps from Google Play Store for free. Good examples are ES Explorer and Astro. Though I am using File Commander as it comes pre-installed in my Sony Xperia C3 Dual. Moving data from internal memory to SD card with these file managers is pretty much easy. Follow these steps -
First open the app and go to internal memory. Here find the file or folder you want to move. Now tap and hold it for few seconds (or you can select other items simultaneously). After this, tap the cut (or move) button and navigate to the SD card location where you want to transfer the file. Finally paste it there and that's it. This way, you can manually transfer files at your desired location.

Another way to transfer data to the SD card from your Android phone is by moving them with your computer or laptop. You just have to copy and paste them. As simple as in above method. Before starting, first you've to connect your Android phone with computer via data cable. Once they are connected and your computer is ready to use it, its time to move your files.
Simply go to My Computer and open the drive where your phone is located. Under this, you'll find two storage options, click internal memory and find the files (or folders) you want to move. Now select them, right-click and tap "Cut" option. Finally open the SD card, again right-click on free space and paste the files there.
Healthy Tip: You should unmount the SD card safely from your Android phone, before unplugging it physically.
So this is how you can easily transfer the data from internal memory of your Android phone to the SD card. If you've any questions, don't forget to ask me in the comments. Stay tuned for other interesting tutorials. Which method you've found interesting and easy.

You might not know that the low memory space is very bad for your Android system health. It can affect your phone's performance due to which, some functions may not work properly. Apps may start hanging as they may not be getting the right space to work. When your internal memory is below threshold limit (say less than 200MB), you'll get an alert notifications as shown in below picture.

In my previous article, I had already discussed some of the tips which can help you to free up to 1GB of space in your Android phone. One the best way is to move the data from your Internal memory to SD card. Here are 3 different ways do this, literally a beginner's guide.
1. Using Android's built-in option
In latest version (5.0 or later), Android has added a new option which let you transfer all media files to the SD card at once. Sounds good? Here's a step-by-step guide to transfer them -
- First of all, go to "Settings".
- Now scroll down and click "Storage".
- Under Miscellaneous section, tap the "Transfer data to SD card" option.

- Now a pop up box will appear. Here you have to select the media files you want to move. Make sure to select all of them. You can also check the available space on SD card.

- When you're ready, tap the "Transfer" button.

Note that, this feature may not transfer all media files. As much as I know, it will transfer your screenshots and camera photos (or videos) only. While rest of the data (such as media files you've downloaded via apps) will remain there in the internal memory. You've to move them manually.
Tip: It's recommended to change the storage location of camera to SD card, so that new photos will be saved there automatically.
2. Using File Manager app
Almost all Android phones have in-built File Manager app using which you can manage data in your internal memory and SD card. If you don't have any, you can install number of third-party file manager apps from Google Play Store for free. Good examples are ES Explorer and Astro. Though I am using File Commander as it comes pre-installed in my Sony Xperia C3 Dual. Moving data from internal memory to SD card with these file managers is pretty much easy. Follow these steps -
First open the app and go to internal memory. Here find the file or folder you want to move. Now tap and hold it for few seconds (or you can select other items simultaneously). After this, tap the cut (or move) button and navigate to the SD card location where you want to transfer the file. Finally paste it there and that's it. This way, you can manually transfer files at your desired location.

3. Using computer via data cable
Another way to transfer data to the SD card from your Android phone is by moving them with your computer or laptop. You just have to copy and paste them. As simple as in above method. Before starting, first you've to connect your Android phone with computer via data cable. Once they are connected and your computer is ready to use it, its time to move your files.
Simply go to My Computer and open the drive where your phone is located. Under this, you'll find two storage options, click internal memory and find the files (or folders) you want to move. Now select them, right-click and tap "Cut" option. Finally open the SD card, again right-click on free space and paste the files there.
Healthy Tip: You should unmount the SD card safely from your Android phone, before unplugging it physically.
So this is how you can easily transfer the data from internal memory of your Android phone to the SD card. If you've any questions, don't forget to ask me in the comments. Stay tuned for other interesting tutorials. Which method you've found interesting and easy.

Leave A Comment