Sometimes we need to find out the complete system information like the processor name, RAM & memory size, BIOS, DirectX version, model number, drivers installed etc., These may be helpful to troubleshoot any system problem especially when we're unable to install any game or software. Most of the newbies will crawl control panel to find such information. Simply, it's a waste of time. What If I say that you can gather all these things under one roof? It will be amazing. Isn't it?
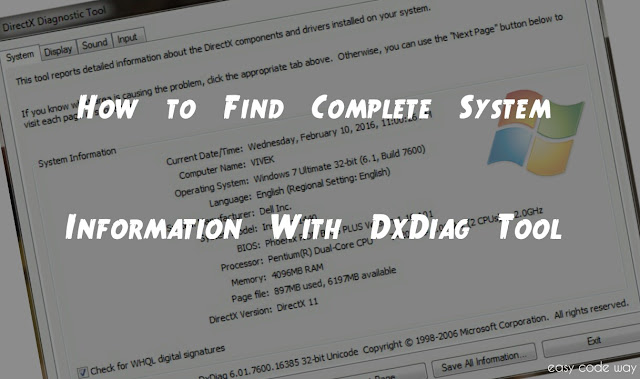
I am talking about DxDiag tool here. DxDiag stands for DirectX Diagnostic Tool. It was pre-installed in all windows version. Basically, this tool reports detailed information about the DirectX components and drivers installed in your computer. One more interesting thing is that, you can save all this data in txt file also. This will help you to analyse this data in future. You can also send this report to your friends or nasty cousins. In today's tutorial, I will guide you how to use this tool in right way. Now let's start!
This tool is not less than a goldmine for your computer which keep records every useful information for users. Now if you want to open this, simply follow these steps -
Similarly you can find out the source of other small problem in your computer. Now let's have a look at each part of this tool. This will give you better dive in this topic.
Under this tool, you'll find 4 basic tabs which are system, display, sound and input. In this section, I will explain everything about this.
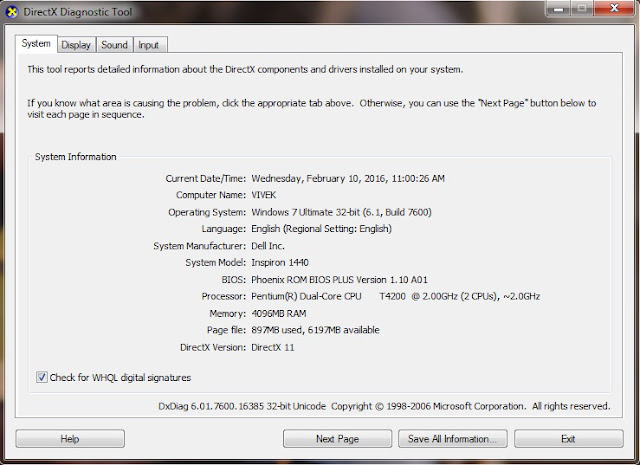
First of all, check system tab. Here you'll find all basic system information like operating system name, language, manufacturer, model name, BIOS, processor, memory and most importantly - DirectX version. Using all these information, you can check whether the game or software you're going to install is supported by your computer or not. I think you don't need any further explanation for this.
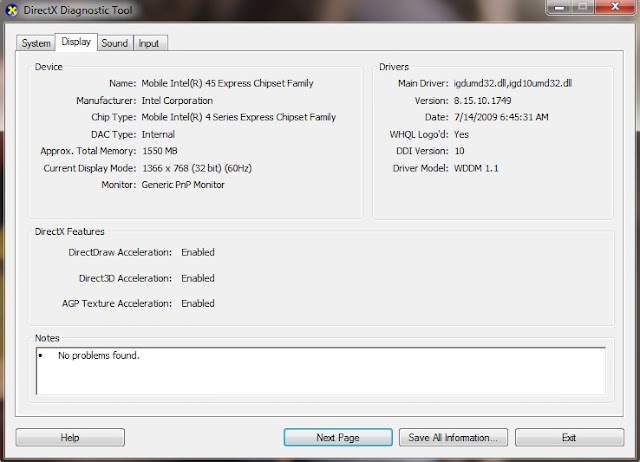
Now move to display tab. Under this, you'll find three sections which are device, driver and DirectX features. Again, you can analyze this data easily. The most important part is the DirectX features. Make sure that all three graphics acceleration are enabled. They are useful to accelerate graphics performance and if they are not active then it may cause slowdown in many applications, the same thing which I had explained above. In this situation, you've to manually enable them which is beyond the scope of this tutorial. For more info, you can google search this topic.
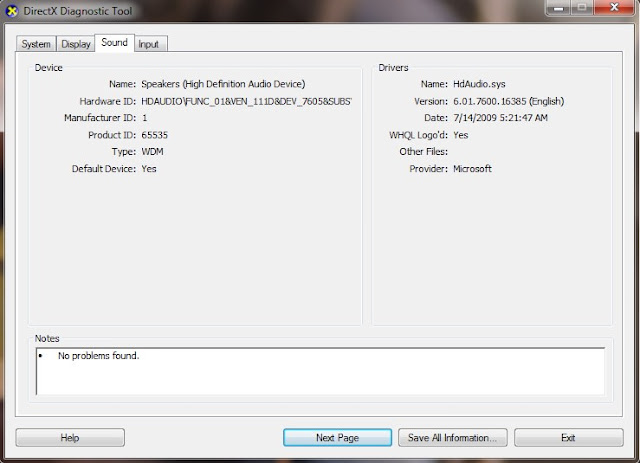
Next is sound tab. This will tell you everything about your audio device and drivers. If you're unable to get sound output from your computer, you can check this part to find out whether it has proper drivers or not. Make sure that you've latest version. Otherwise try upgrading it from the Internet. In this way, you can easily solve this problem without paying anything to your service center.
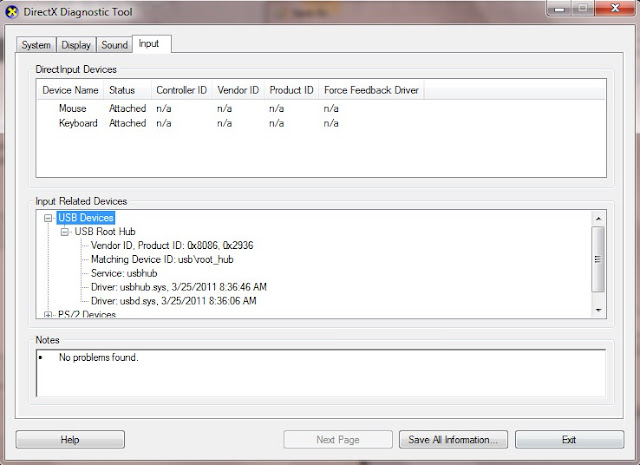
Finally comes Input tab. This will show you all inputs attached to your computer. For example, In my case, you can see that the status of mouse and keyboard device is active which means they are working fine. If any of the external input device (say Pendrive) fails to respond then you can check whether this dxdiag tool is showing it inside input data or not. If not, reinstall the input device by unplugging it and then plugging it back in. In this way, you can easily troubleshoot this problem with this tool. Isn't that cool? Haha.
Last but not least, you can save all above information in txt file also. As already mentioned, this will help you to analyze the report in future. Additional, you can compare it with your friends system report also. Now to save all these things, simply open DirectX Diagnostic tool and click "Save all information" button. After this, name your file and select the location where you want to store it. Finally hit save button and that's it. Now open the newly created txt file and use it anywhere.
Also Read: Boost Windows 7 Speed by Turning off Visual Effects
So that's all for today guys. Now I hope that you've complete knowledge about this topic. Still having some burning questions in your mind? You can discuss them in below comment box. Now it's your turn! Good bye, take care!

I am talking about DxDiag tool here. DxDiag stands for DirectX Diagnostic Tool. It was pre-installed in all windows version. Basically, this tool reports detailed information about the DirectX components and drivers installed in your computer. One more interesting thing is that, you can save all this data in txt file also. This will help you to analyse this data in future. You can also send this report to your friends or nasty cousins. In today's tutorial, I will guide you how to use this tool in right way. Now let's start!
Steps to Open DxDiag Tool
This tool is not less than a goldmine for your computer which keep records every useful information for users. Now if you want to open this, simply follow these steps -
- First of all, turn on your laptop or computer (Just kidding :p)
- Now click on start menu button
- In search box, type "dxdiag.exe" and open first result. If it ask to allow administrator permission then simply click ok button or give password. Alternatively, you can search for the above word in run command also.
Similarly you can find out the source of other small problem in your computer. Now let's have a look at each part of this tool. This will give you better dive in this topic.
Other Features in DirectX Diagnostic Tool
Under this tool, you'll find 4 basic tabs which are system, display, sound and input. In this section, I will explain everything about this.

First of all, check system tab. Here you'll find all basic system information like operating system name, language, manufacturer, model name, BIOS, processor, memory and most importantly - DirectX version. Using all these information, you can check whether the game or software you're going to install is supported by your computer or not. I think you don't need any further explanation for this.

Now move to display tab. Under this, you'll find three sections which are device, driver and DirectX features. Again, you can analyze this data easily. The most important part is the DirectX features. Make sure that all three graphics acceleration are enabled. They are useful to accelerate graphics performance and if they are not active then it may cause slowdown in many applications, the same thing which I had explained above. In this situation, you've to manually enable them which is beyond the scope of this tutorial. For more info, you can google search this topic.

Next is sound tab. This will tell you everything about your audio device and drivers. If you're unable to get sound output from your computer, you can check this part to find out whether it has proper drivers or not. Make sure that you've latest version. Otherwise try upgrading it from the Internet. In this way, you can easily solve this problem without paying anything to your service center.

Finally comes Input tab. This will show you all inputs attached to your computer. For example, In my case, you can see that the status of mouse and keyboard device is active which means they are working fine. If any of the external input device (say Pendrive) fails to respond then you can check whether this dxdiag tool is showing it inside input data or not. If not, reinstall the input device by unplugging it and then plugging it back in. In this way, you can easily troubleshoot this problem with this tool. Isn't that cool? Haha.
Save All Information In txt File
Last but not least, you can save all above information in txt file also. As already mentioned, this will help you to analyze the report in future. Additional, you can compare it with your friends system report also. Now to save all these things, simply open DirectX Diagnostic tool and click "Save all information" button. After this, name your file and select the location where you want to store it. Finally hit save button and that's it. Now open the newly created txt file and use it anywhere.
Also Read: Boost Windows 7 Speed by Turning off Visual Effects
So that's all for today guys. Now I hope that you've complete knowledge about this topic. Still having some burning questions in your mind? You can discuss them in below comment box. Now it's your turn! Good bye, take care!

Leave A Comment